Some posts on this site contain affiliate links. If you book or buy something through these links, I earn a small commission (at no extra cost to you). Take a look at my privacy policy for more information.

Here’s how to make an awesome travel video, for free, using Filmora video editor software…
There’s really no better way of capturing your travel memories than by making a movie of your trip. And you don’t need to be a professional travel vlogger, have amazing equipment, or even spend any money, to do it!
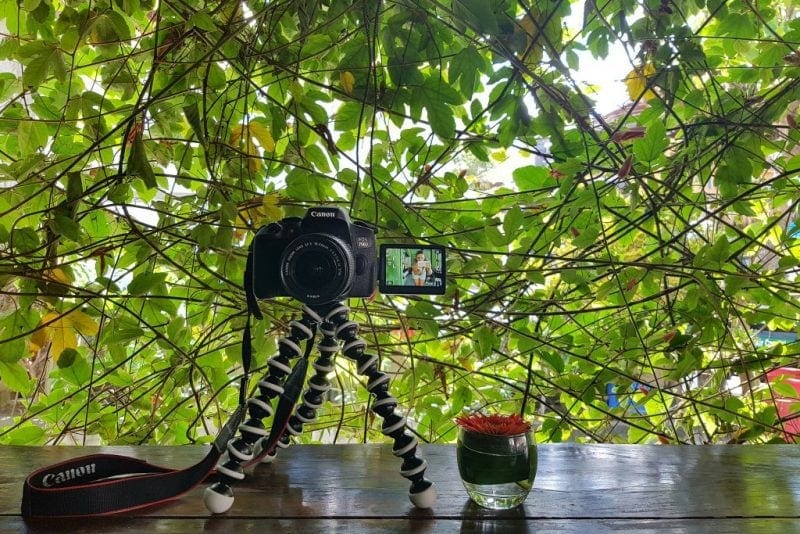
In this blog post, I’ve included a short video I made from my recent trip to Sri Lanka. I shot the whole thing on my phone (no fancy equipment) and edited it using Filmora video editor – which is free to use.
I’m here to show you how to use Filmora to create your own travel videos! It’s super easy to use, so anyone can create awesome, professional-looking movies without a bunch of technical knowledge.
Just for clarification, I was already a HUGE fan of Filmora before they reached out to me about writing this review post. I’ve been using their video editor software to make my travel movies for several years and absolutely love them.
With the exception of a few early videos, all the videos on my YouTube channel were edited using Filmora. So when I recommend Filmora as the best video editor, you know it’s a genuine recommendation!
Read on to find out how to edit your own travel video using this awesome software…
Do you Need a Video Editor?
It often feels like everyone wants to be a content creator in the digital age. Especially when it comes to showcasing our travels.
Between TikTok, Reels and Stories on Instagram, Facebook videos, and YouTube… there are so many ways to show off your travel videos. There are some free smartphone apps that can help you edit videos for social media – but they can be a bit fiddly and aren’t always the best quality.
If you want to make a really great travel video to remember your travels – one that you could display on your home TV, or even share publically on YouTube – you should look for a decent video editor.
Why Filmora is the Best Video Editor
A few years ago, I did a bunch of research looking for a really good, free video editor for Windows. Filmora was recommended time and again, so I downloaded it.
After several years of exclusively using Filmora to make my travel videos, I still think it’s the best editor for amateurs like me. It’s free to download, it’s SO easy to use, and with every update, the software gets better and better.
Plus, there’s a huge library of free effects, transitions, titles, and other elements to help take your videos to the next level. If you want access to even more, there’s a two-tiered subscription service with tons more effects and elements. But you can still make brilliant videos using just the free options.
To show you just how easy Filmora is to use, I’ve outlined how to make a simple travel video below. I’m not at all technical and usually suck at stuff like this – so if I can figure it out, I promise you can!
My Travel Video – Edited with Filmora
My video of glamping in Sri Lanka was shot on my phone and edited in Filmora.
How to Use Filmora to Make a Great Travel Video
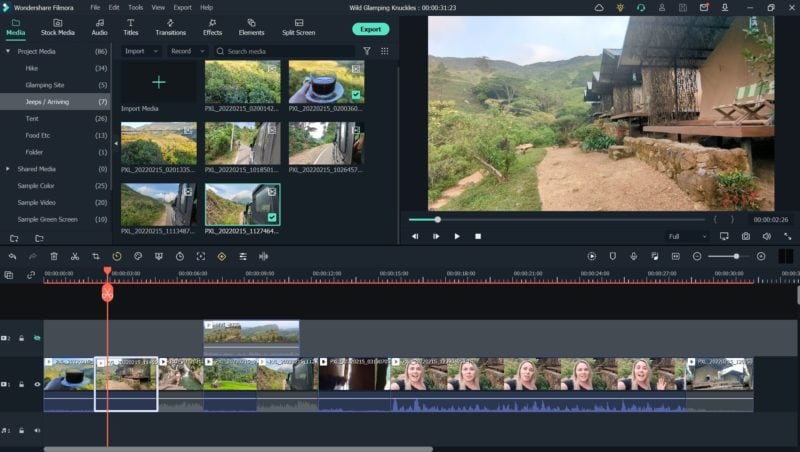
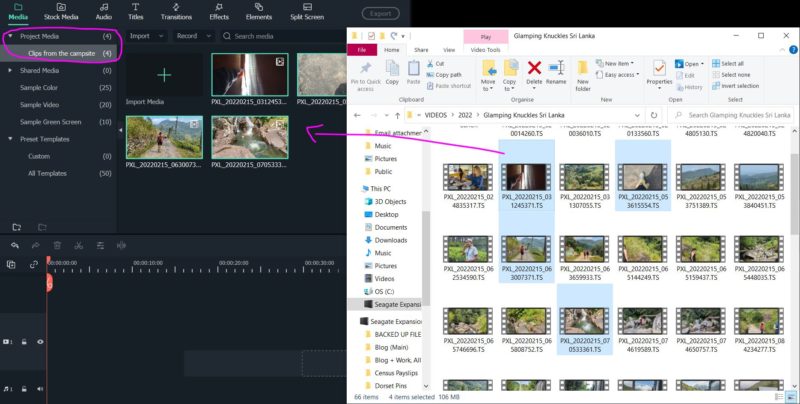
Step 1 – Load your video clips into the software
Open up Filmora’s video editor and create a new project. Then you simply click and drag your video files into the “Project Media” section under the “Media” tab.
Top tip – the best aspect ratio for a YouTube video is 16:9.
If you have a lot of video clips (I always do), I STRONGLY recommend creating labelled folders first and dragging individual files into each folder, to help you find things easily when you start editing.
You’ll also want to upload any music tracks you want to use for your video. Filmora’s free plan comes with quite a few simple music tracks you can use – and even more in their paid versions – or you could source your own.
If your video is just for personal use, any track should be fine – but if you plan on sharing the content on a platform like YouTube, you need to make sure you have the rights to use any music.
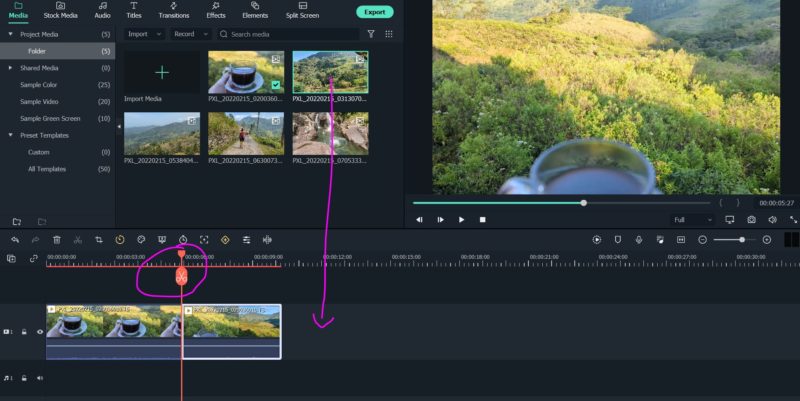
Step 2 – Order and Edit your Clips
Once you’ve figured out which clips you want to use to make your travel video, you can start putting them in order!
Simply click on the track in your media library and drag it directly onto the video track at the bottom of the screen. Once it’s in, you can make the clip shorter by clicking and dragging either end of it to the desired length, or snip it using the orange scissors icon.
Right-click on the clip in your video track for some extra editing options. For example, you can mute the track if it has unwanted audio, or use the speed editor to slow it down or speed things up.
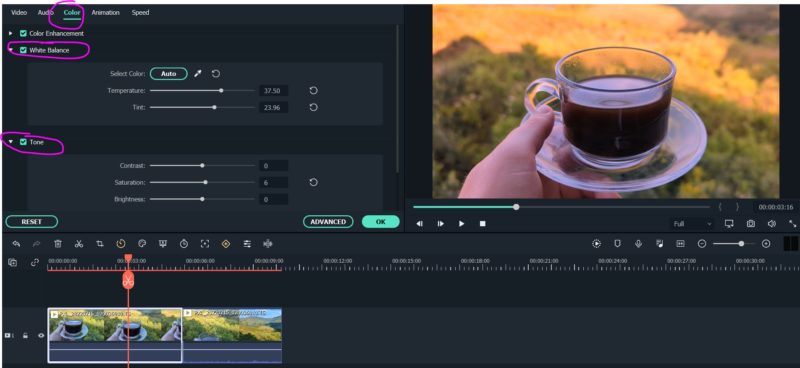
Colour Correction and Other Edits
If you want to get a bit more technical, you can also do further editing on the “Video” page. Double-click on a video clip to open it, and you’ll find various settings to do things like rotate the clip or add stabilisation.
Click through to the “Color” tab to edit the appearance of the video itself. You can tweak the temperature and tint of the colours under “White Balance”, or change the brightness, saturation and contrast under “Tone”.
It’s not really necessary, so you could skip this if you’re happy with the way your footage looks. But if you have a clip that looks a bit dull, a few small tweaks on this page can make a difference.
Adding Music and Voiceovers
If you’re using music on your video, find it in your library and drag it onto the audio track at the bottom, beneath the video track. Again, you can click and drag the end to shorten the track, or use the snip tool to cut it down.
You can also add a second audio track to add voiceovers and sound effects. You can record voiceovers directly on Filmora using your computer’s microphone, or upload them separately. I record mine sitting under my duvet (to get rid of background noise) using my phone’s recorder software, then drag them into Filmora to add to the video.
Top tip: If you have any talking in your video, you might want to lower the music during those parts. In the “audio” tab you can add a volume keyframe to easily change the audio in different parts of one track. Watch this video to see how.
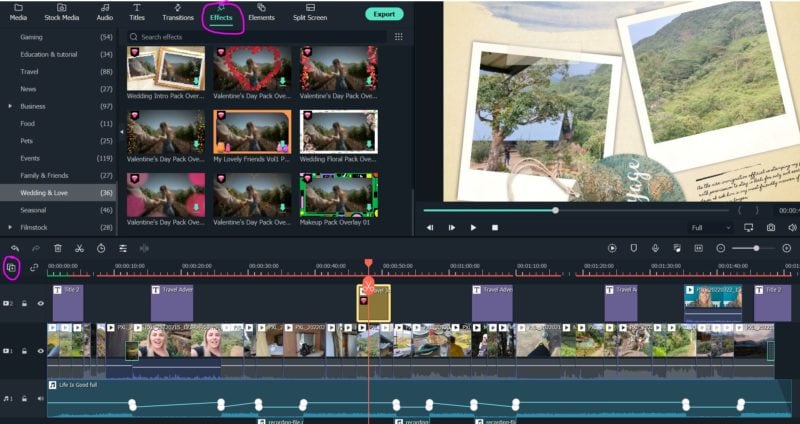
Step 3 – Add Transitions and Effects
Once you’ve got all your clips in order and you’re happy with the timings etc, it’s time to get creative. You can add special effects from Filmora’s huge library (many are free).
Effects
Under the “Effects” tab, you’ll find frames and overlays to add over a clip (great for a title page perhaps), as well as graphics and animations. You could add lens flares or twinkling stars over a dreamy landscape, or a love-heart sticker over the top of a romantic moment, for example!
There are also stylisations and filters to change the way the clip looks or moves, like a sketch effect (think that “Take On Me” music video from the 80s) or glitchy distortions. The library is VAST, so have a play around and get creative.
To add your effects, click on the plus button above your tracks layout (circled in pink on the below screenshot) and add a 2nd video track. Then drag your chosen effect onto this new video track, above the clip where you want the overlay to show.
Transitions
Transitions are also a really great way to take your travel video to the next level. These are effects that play between two video clips in order to move from one to the next – or to fade to black.
You can use something simple, like fade or dissolve, to transition subtly between two clips. Or something more creative, like a turning page, a retro pixelated gaming glitch, or a 3D camera roll. Again, there’s a huge library to choose from, so get experimenting.
To add, simply drag your chosen transition directly onto the video track either at the end of a clip, or between two different clips. You can double click on the transition in the video track to edit the length – make it less than 1 second for a subtle, barely-noticeable transition.
Top tip: You don’t need to add a transition onto every clip (unless you want to), but they’re a good way to move between two different scenes. When you’re editing a travel video, a transition is a great way to signify a new location.

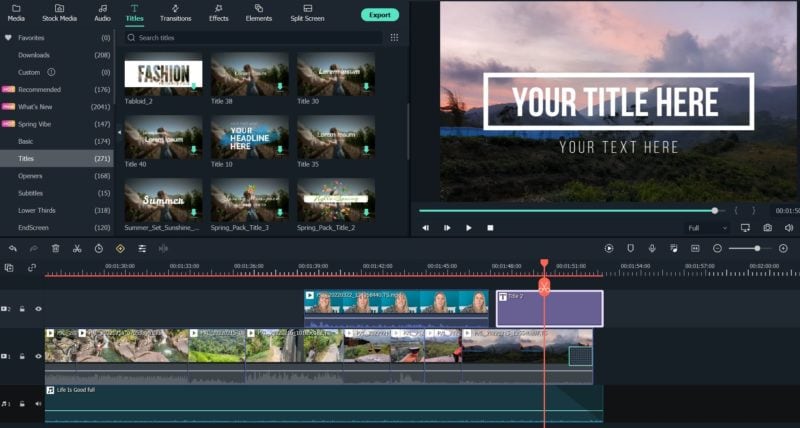
Step 4 – Add Text and Titles
Finally, you can also add text to your video – like an opening title, captions and subtitles, or headings for different scenes of the video.
I like to add an opening headline over the top of my first few shots (I always use the same one), then “Lower Third” subheadings to display the different locations throughout my travel movie.
Many of the titles and text options are animated, and there are LOADS of fab free options in the Filmora library. So have a browse and play around to find your style.
Simply go through the “Titles” tab to search the text library for one that suits you, then drag it onto your video track. If you want the text to appear over the top of your video, drag it onto a second video track – like we did with the effects.
You can also drag it onto the main video track if you want the text to appear all by itself, like a full-page opening title, or credits at the end of your video.
Step 5 – Export your Video
Once you’re happy with your video, you can export it to use however you want. Filmora have an option to upload straight to YouTube or Vimeo, but I recommend exporting the file first and uploading manually.
Click “Export”, then “Create Video”, and select the file type you want (usually MP4). I tend to leave most settings as they are – but click on the “Settings” button and change the quality to “Best” before clicking export to save your video.
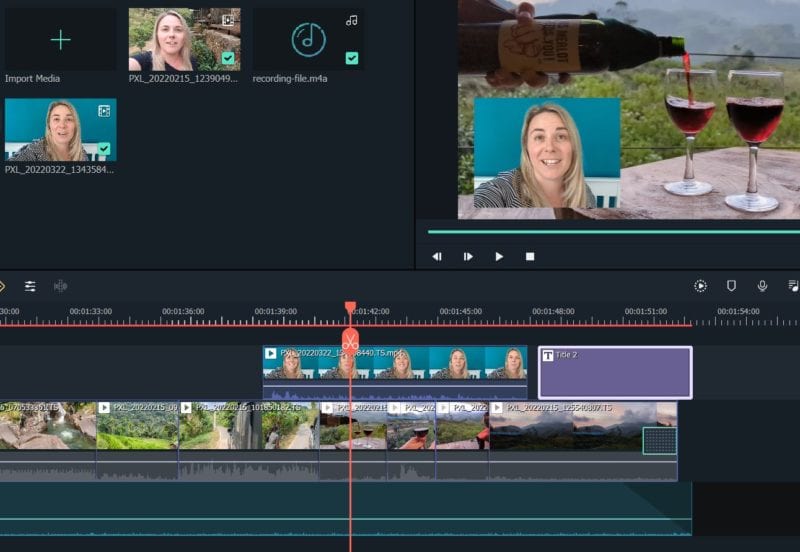
Bonus Step – Get Creative
Once you’ve mastered the basics and feel like you’re getting to grips with Filmora’s software, you can start getting creative.
This video editor makes it really easy to add in extra, professional-level touches. For example, you can easily add a “picture in picture” effect to have a smaller video over the top of the main one – like the “talking head” box at the end of my video.
Head to Filmora’s YouTube Channel to find loads of really helpful how-to guides and tutorials to help you take your travel video editing to the next level!
Final Thoughts
There is SO MUCH you can do with the Filmora video editor, and it’s so easy to use once you get started.
I tend to keep things fairly simple, as that’s my preferred style – but you can create much more elaborate videos than mine. Experiment, play around, and enjoy it. And feel free to comment below with links to any travel videos you create using Filmora! I’d love to see them!
So, that was how to make a travel video using Filmora! Any questions feel free to reach out in the comments and I’ll try to help!